- Building a Quiz App Powered by Nuxt Content (Part 1)
- Building a Quiz App Powered by Nuxt Content (Part 2) 👈🏻 We're here
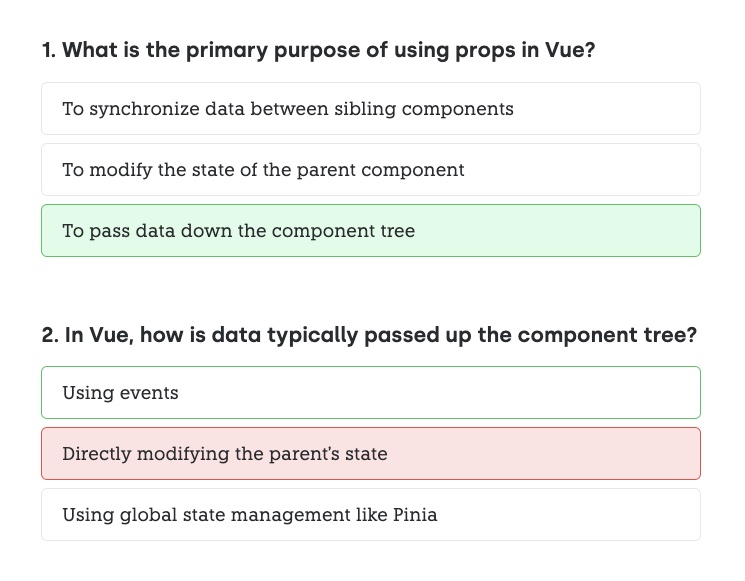
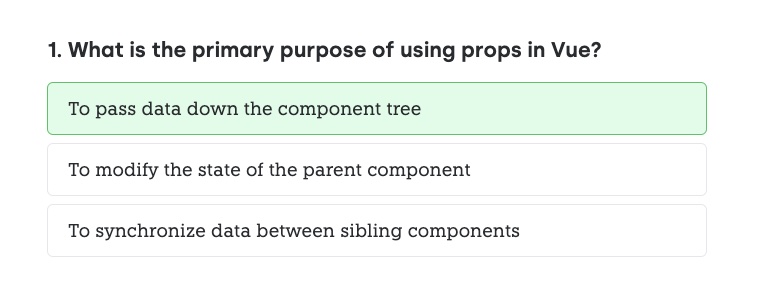
How do you add complex interactivity to Nuxt Content?
The secret lies in using the Data Store Pattern.
This is the second in a two-part series on building an interactive quiz application on top of Nuxt Content.
In the last article, we built the quiz and quiz results components — now it's time to link everything together to make a dynamic and interesting app!
Quick Recap
Before diving into the tutorial steps, let's refresh ourselves on the current state of our quiz application.
Quiz.client.vue
This component is responsible for displaying individual quiz questions and their respective answers.
It manages the state of each question, including the question text, the list of answers, the selected answer, and the display of results.
<template>
  <div>
    <h3>{{ id }}. {{ question }}</h3>
    <div class="flex flex-col space-y-2 mt-4">
      <label
        v-for="(answer, index) in orderedAnswers"
        :key="answer"
        class="rounded-md py-3 px-5 border transition-colors duration-150"
        :class="{
          'border-gray-300': !showResults && selected !== index,
          'border-gray-500 bg-gray-100': !showResults && selected === index,
          'border-green-500': showResults && index === correctAnswerIndex,
          'bg-green-100':
            showResults && selected === index && index === correctAnswerIndex,
          'border-red-500 bg-red-100':
            showResults && selected === index && index !== correctAnswerIndex,
          'cursor-not-allowed': showResults,
          'cursor-pointer hover:bg-gray-100 hover:border-gray-500':
            !showResults,
        }"
      >
        <input
          type="radio"
          name="answer"
          class="hidden"
          :disabled="showResults"
          :value="index"
          v-model="selected"
        />
        {{ answer }}
      </label>
    </div>
  </div>
</template>

<script setup>
const props = defineProps({
  question: String,
  answers: Array,
});

const id = 1;
const showResults = ref(false);
const selected = ref(-1);
const orderedAnswers = props.answers;
const correctAnswerIndex = 0;
</script>
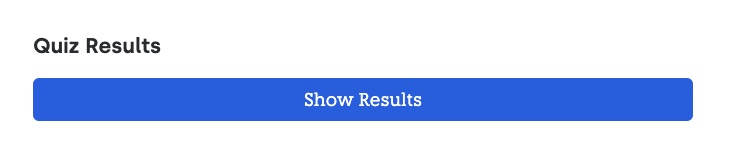
QuizResults.client.vue
This component shows the results of the quiz, including the score and a summary of correct and incorrect answers.
It's designed to display the results once the quiz is completed.
<template>
  <div class="mb-24">
    <div class="flex flex-row justify-between items-end">
      <h3 class="text-3xl font-bold quiz-header mb-4">Quiz Results</h3>
      <button
        class="rounded-md bg-blue-500 text-white p-2"
        @click="showResults = !showResults"
      >
        {{ showResults ? 'Hide Results' : 'Show Results' }}
      </button>
    </div>

    <div
      v-if="showResults"
      class="flex justify-between mt-8"
      :class="{
        'text-green-500': score.percentage >= 70,
        'text-yellow-500': score.percentage >= 50 && score.percentage < 70,
        'text-red-500': score.percentage < 50,
      }"
    >
      <span class="text-3xl font-bold">{{ score.percentage }}%</span>
      <span class="text-3xl font-bold">
        {{ score.correct }}/{{ score.total }}
      </span>
    </div>
  </div>
</template>
index
This Markdown file contains the content of the quiz, including the questions and answers.
It uses the MDC syntax to define quiz questions and their possible answers, which are then rendered by the other two components.
Here's just a section of the file.
Note how we can sprinkle whatever writing and content we want in between the questions, since it's just a Markdown file:
<!-- ... -->

::quiz
---
question: "What will be the output of ‘2’ + 2 in JavaScript?"
answers: [
  "'22'",
  "4",
  "'2'2"
]
---
::

## Advanced Questions

This is the last section of the quiz with more difficult questions.

::quiz
---
question: "How can you handle asynchronous operations in JavaScript?"
answers: [
  "Promises, async/await, or callbacks",
  "For loops",
  "Synchronous functions"
]
---
::

::quiz
---
question: "What is a closure in JavaScript?"
answers: [
  "A function having access to the parent scope, even after the parent function has closed",
  "A method for closing all active windows",
  "A loop that continuously closes and opens"
]
---
::

<!-- ... -->
Adding Interactivity: Data Store Pattern
The initial design of our quiz application, while functional, has certain limitations due to its reliance on local state within each quiz component.
This structure means that each quiz is isolated, functioning independently without any awareness of other quizzes in the application.
It's sort of interactive, but impossible to implement a scoring system!
To address these challenges, we are implementing the Data Store Pattern.
This pattern involves creating a centralized data store that manages the state and logic of the quizzes. By doing this we can:
- Enable Cross-Quiz Interactions: With a shared data store, quizzes can be aware of each other. This allows for features like cumulative scoring across different quizzes, adaptive difficulty levels based on user performance, or even unlocking new quizzes based on previous results.
- Improve State Management: Centralizing state in a shared data store simplifies individual components. Components become less cluttered and more maintainable, focusing mainly on presentation logic.
- Enhance User Experience: A centralized data store allows for a more dynamic and responsive user experience. For instance, real-time feedback based on cumulative performance, personalized quiz recommendations, and more interactive quiz elements can be implemented more easily in the future.
- Leverage Nuxt Content Dynamically: Although Nuxt Content is primarily designed for static content, by integrating it with a dynamic data store, we can leverage its capabilities for content management while adding some snazzy interactive magic on top.
So, this refactoring is not just about cleaning up the code — it's about transforming the quizzes from being static, isolated components into a dynamic, interconnected learning experience.
Let's get started, shall we?!
Refactoring to Share State
Step 1: Creating the useQuiz Composable
We start by building the useQuiz.js composable. This composable will serve as the central manager for our quiz's data and logic.
We create a reactive state with properties questions, showResults, and score. The toRefs function is used to ensure these properties stay reactive when destructured in other components.
It's important to note that questions is not exposed outside this composable to encapsulate the quiz logic — we want to keep that private.
// useQuiz.js
import { reactive, toRefs } from 'vue';

const state = reactive({
  questions: [],
  showResults: false,
  score: {
    correct: 0,
    total: 0,
    percentage: 0,
  },
});

export default () => {
  const { showResults, score } = toRefs(state);

  return {
    showResults,
    score,
  };
};
Step 2: Refactoring Quiz.client.vue to Use useQuiz
In Quiz.client.vue, we refactor the component to use the useQuiz composable.
Really, all we need is the showResults value so we can control whether or not the quiz component should be showing the results or allow the user to change the selected answer.
<!-- Quiz.client.vue -->
<script setup>
import { defineProps } from 'vue';
import useQuiz from './useQuiz';

const props = defineProps({
  question: String,
  answers: Array,
});

const { showResults } = useQuiz();
</script>
Step 3: Implementing addQuestion in useQuiz.js
Now we need to add the addQuestion function to useQuiz.js.
This function handles adding questions to the quiz, randomizing answers, and tracking the selected answer. It's one of the most important parts for dynamically managing quiz content.
// useQuiz.js

// ...

const addQuestion = (question, answers) => {
  const orderedAnswers = [...answers].sort(() => Math.random() - 0.5);
  const correctAnswerIndex = orderedAnswers.findIndex(
    (answer) => answer === answers[0]
  );

  const q = {
    id: state.questions.length + 1,
    question,
    answers,
    orderedAnswers,
    correctAnswerIndex,
    selected: ref(-1),
  };

  state.questions.push(q);

  return q;
};

return {
  addQuestion,
  showResults,
  score,
};
Step 4: Integrating addQuestion into Quiz.client.vue
In Quiz.client.vue, we'll also grab the addQuestion function from useQuiz.
The component now completely relies on useQuiz for managing the state of each quiz question!
<!-- Quiz.client.vue -->
<script setup>
// ...

const { addQuestion, showResults } = useQuiz();
const { id, selected, orderedAnswers, correctAnswerIndex } = addQuestion(
  props.question,
  props.answers
);
</script>
Before, the component created its own variables to track all of this. Now, we're relying on the data store we created to handle that for us.
So we need to first call addQuestion so we can add our question to the store. Then, we get back the question's id, and all of the related variables.
Now we just need to calculate the score to tie everything together!
Step 5: Adding Score Calculation in useQuiz.js
In useQuiz.js we add the calculateScore function and a watch.
This automatically updates the score whenever showResults changes, keeping the score calculation logic centralized in the data store composable.
// useQuiz.js

// ...

const calculateScore = () => {
  const correct = state.questions.filter(
    (question) => question.correctAnswerIndex === question.selected.value
  ).length;

  state.score = {
    correct,
    total: state.questions.length,
    percentage: correct / state.questions.length * 100,
  };
};

watch(() => state.showResults, calculateScore);

return {
  addQuestion,
  showResults,
  score,
};
Step 6: Using useQuiz in QuizResults.client.vue
Finally, QuizResults.client.vue integrates useQuiz to use the score and showResults states.
Now we can actually display the quiz score!
<script setup>
import useQuiz from './useQuiz';

const { showResults, score } = useQuiz();
</script>
The Final Result
With that, we've now finished our refactoring!
What have we accomplished?
We've centralized the quiz logic within the useQuiz data store composable, and streamlined our Vue components. Our data store shares common data between the components without needing to pass data through the component tree. This is crucial, since we don't have access to the component tree when using MDC.
The data store also lets us co-locate business logic like addMethod and calculateScore alongside the quiz state. This gives us a nice separation between our UI and our business logic.
The result is a more maintainable, scalable, and cleaner codebase that adheres to the principles of reusability and separation of concerns.
You can learn more about the Data Store Pattern here.
Let's take a look at what our files look like now.
useQuiz.js
// useQuiz.js
import { reactive, toRefs } from 'vue';

const state = reactive({
  questions: [],
  showResults: false,
  score: {
    correct: 0,
    total: 0,
    percentage: 0,
  },
});

export default () => {
  const { showResults, score } = toRefs(state);

  const addQuestion = (question, answers) => {
    const orderedAnswers = [...answers].sort(() => Math.random() - 0.5);
    const correctAnswerIndex = orderedAnswers.findIndex(
      (answer) => answer === answers[0]
    );

    const q = {
      id: state.questions.length + 1,
      question,
      answers,
      orderedAnswers,
      correctAnswerIndex,
      selected: ref(-1),
    };

    state.questions.push(q);

    return q;
  };

  const calculateScore = () => {
    const correct = state.questions.filter(
      (question) => question.correctAnswerIndex === question.selected.value
    ).length;

    state.score = {
      correct,
      total: state.questions.length,
      percentage: correct / state.questions.length * 100,
    };
  };

  watch(() => state.showResults, calculateScore);

  return {
    addQuestion,
    showResults,
    score,
  };
};
Quiz.client.vue
<!-- Quiz.client.vue -->
<template>
  <div>
    <h3>{{ id }}. {{ question }}</h3>
    <div class="flex flex-col space-y-2 mt-4">
      <label
        v-for="(answer, index) in orderedAnswers"
        :key="answer"
        class="rounded-md py-3 px-5 border transition-colors duration-150"
        :class="{
          'border-gray-300': !showResults && selected !== index,
          'border-gray-500 bg-gray-100': !showResults && selected === index,
          'border-green-500': showResults && index === correctAnswerIndex,
          'bg-green-100':
            showResults && selected === index && index === correctAnswerIndex,
          'border-red-500 bg-red-100':
            showResults && selected === index && index !== correctAnswerIndex,
          'cursor-not-allowed': showResults,
          'cursor-pointer hover:bg-gray-100 hover:border-gray-500':
            !showResults,
        }"
      >
        <input
          type="radio"
          name="answer"
          class="hidden"
          :disabled="showResults"
          :value="index"
          v-model="selected"
        />
        {{ answer }}
      </label>
    </div>
  </div>
</template>

<script setup>
const props = defineProps({
  question: String,
  answers: Array,
});

const { addQuestion, showResults } = useQuiz();
const { id, selected, orderedAnswers, correctAnswerIndex } = addQuestion(
  props.question,
  props.answers
);
</script>