- Building a Quiz App Powered by Nuxt Content (Part 1) 👈🏻 We're here
- Building a Quiz App Powered by Nuxt Content (Part 2)
In this tutorial, we'll be using Nuxt Content to build a quiz application.
The first part will focus on using Nuxt Content to render out some custom quiz components with basic interactivity.
Then, the next article will dive into how we can add dynamic scoring using the Data Store Pattern, which really takes things to the next level.
Using Nuxt Content with MDC
I won't be covering the basics of Nuxt Content here, but I do want to give a quick overview so we're all on the same page.
Here's our overall file structure, the three main files we'll be working with in our Nuxt app:
-
/content/index.md -
/components/content/Quiz.client.vue -
/components/content/QuizResults.client.vue
Nuxt Content renders out what's inside the /content directory, so we'll put all of our quiz content inside of index.md.
In order for Nuxt Content to find our Vue components, they need to be inside the special /components/content directory. So that's where we'll place the Quiz and QuizResults components.
With the architecture taken care of, let's get to building!
Display the questions
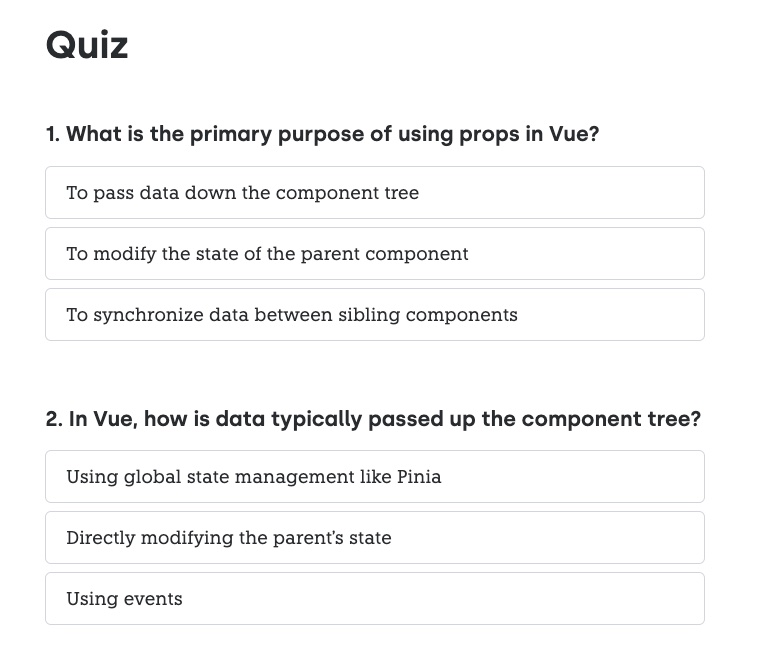
The Quiz.client.vue component plays a central role in our application, presenting quiz questions and their options.
The initial setup includes the question and placeholder for answers in the template:
<template>
  <div>
    <h3>{{ id }}. {{ question }}</h3>
    <!-- Placeholder for answer choices -->
  </div>
</template>
Next, we define props and reactive variables like id, showResults, selected, and orderedAnswers:
<script setup>
const props = defineProps({
  question: String,
  answers: Array,
});

const id = 1;
const showResults = ref(false);
const selected = ref(-1);
const orderedAnswers = props.answers;
</script>
Later on we'll use orderedAnswers to randomize the order of our potential answers every time we load the quiz. This will make it a bit more challenging, and is necessary based on how we will write our answers.
We then render the answer choices using v-for to iterate over orderedAnswers:
<template>
  <!-- Existing code -->
  <div class="flex flex-col space-y-2 mt-4">
    <label
      v-for="(answer, index) in orderedAnswers"
      :key="answer"
      class="rounded-md py-3 px-5 border"
    >
      <input
        type="radio"
        name="answer"
        class="hidden"
        :value="index"
        v-model="selected"
      />
      {{ answer }}
    </label>
  </div>
</template>
Now we just need some way to see how we did on the questions!
Showing the results of the quiz
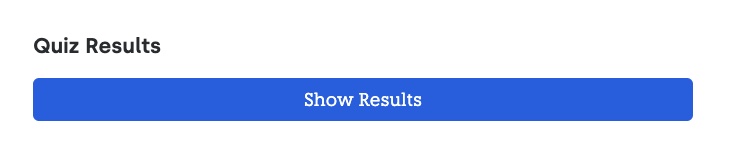
The QuizResults.client.vue component displays the quiz results. We'll scaffold out the basic structure:
<template>
  <div class="mb-24">
    <h3 class="text-3xl font-bold quiz-header mb-4">
      Quiz Results
    </h3>
  </div>
</template>
Next, we add some state so we can toggle between showing results or taking the quiz:
<script setup>
const showResults = ref(false);
</script>
We then add a button to toggle this state:
<template>
  <div class="mb-24">
    <div class="flex flex-row justify-between items-end">
      <h3 class="text-3xl font-bold quiz-header mb-4">
        Quiz Results
      </h3>
      <button
        class="rounded-md bg-blue-500 text-white p-2"
        @click="showResults = !showResults"
      >
        {{ showResults ? 'Hide Results' : 'Show Results' }}
      </button>
    </div>
  </div>
</template>
That's basically it for this component.
But we need to do some more work on the Quiz question component.
Improving answer interaction with awesome styling
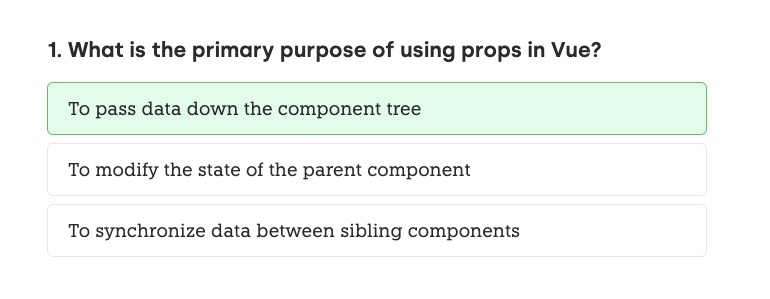
We now enhance Quiz.client.vue by adding dynamic styles and interactivity to answer choices.
Vue's class binding allows us to apply styles based on the component's state:
<template>
  <div>
    <h3>{{ id }}. {{ question }}</h3>
    <div class="flex flex-col space-y-2 mt-4">
      <label
        v-for="(answer, index) in orderedAnswers"
        :key="answer"
        class="rounded-md py-3 px-5 border transition-colors duration-150"
        :class="{
          'border-gray-300': !showResults && selected !== index,
          'border-gray-500 bg-gray-100': !showResults && selected === index,
          'border-green-500': showResults && index === correctAnswerIndex,
          'bg-green-100':
            showResults && selected === index && index === correctAnswerIndex,
          'border-red-500 bg-red-100':
            showResults && selected === index && index !== correctAnswerIndex,
          'cursor-not-allowed': showResults,
          'cursor-pointer hover:bg-gray-100 hover:border-gray-500':
            !showResults,
        }"
      >
        <input
          type="radio"
          name="answer"
          class="hidden"
          :disabled="showResults"
          :value="index"
          v-model="selected"
        />
        {{ answer }}
      </label>
    </div>
  </div>
</template>
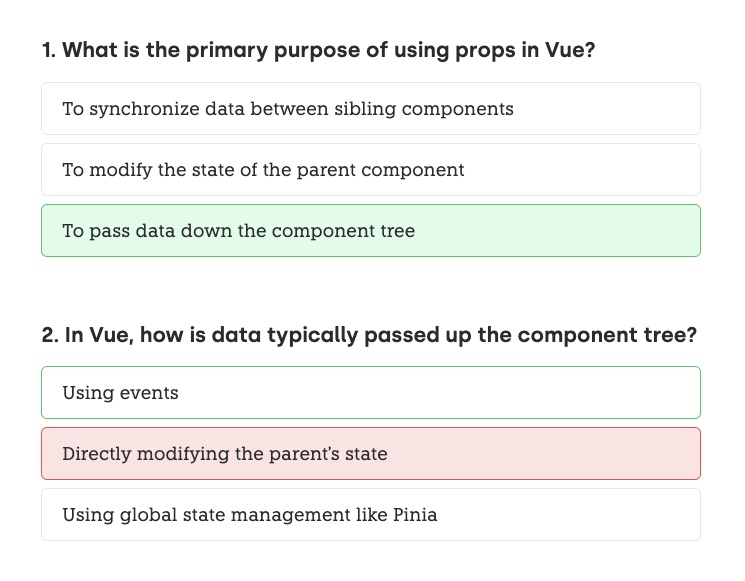
This will change the background colour and border colour based on if we've selected the correct (or incorrect) answer, and if we're currently showing results.
If you want, you can stuff this into a computed ref to clean things up.
But where does correctAnswerIndex come from?
We need to add that in still:
<script setup>
const props = defineProps({
  question: String,
  answers: Array,
});

const id = 1;
const showResults = ref(false);
const selected = ref(-1);
const orderedAnswers = props.answers;
const correctAnswerIndex = 0;
</script>
By default, we'll assume the first answer in our list is always the correct answer.
Of course, this will make for a terrible quiz. Just pick the first option!
But it makes writing our quizzes a lot easier, we just need to randomize the answers — which we'll get to in the next article in the tutorial.
Adding the Quiz Content in index.md
Okay, now we have two main parts:
- Asking the questions
- Toggling the results of the quiz
But we're missing the actual content for the quiz.
We can solve that using Nuxt Content.
We'll create a new index.md file in our /content folder. This file holds the quiz content in Markdown format.
Quiz questions and answers are structured using the MDC syntax that looks like this:
# The First

This is the first quiz, it's on Javascript.

## Beginner Questions

::quiz
---
question: "What is a callback function in JavaScript?"
answers: [
  "A function passed into another function as an argument",
  "A function that calls back the operating system",
  "A function that repeats code"
]
---
::
We have whatever Markdown we want, and then using ::quiz we can insert quiz components wherever we need them.
The --- block lets us list out props in a YAML-style syntax which is nice and readable.
Wrapping Up
That's where we'll end this first part of the tutorial.
We've leveraged Nuxt Content to build a quiz system that we can write entirely in Markdown.
Make an entire page dedicated to your quiz, or sprinkle in questions through a blog post or docs — you have complete flexibility.
But you'll notice one problem — we don't actually have any way of scoring our quiz yet.
That's what we'll cover in the next part of this tutorial.